The App Development Process in 5 Easy Steps
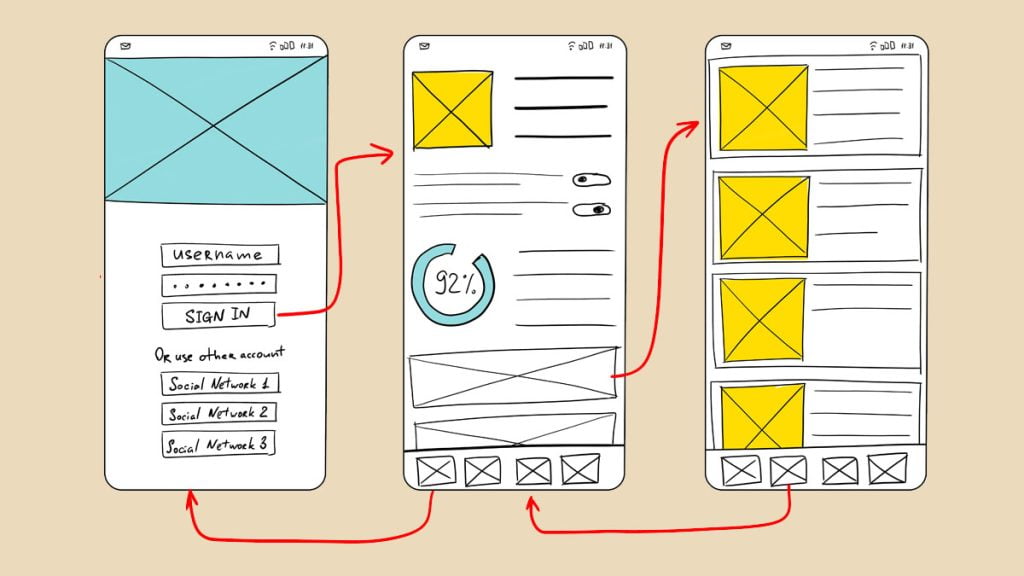
The app development process, while not a simple endeavor, can be categorized into five easy-to-follow steps.
The process starts with meticulous project planning. Then we move on to wireframes and click-through prototypes. After this, our developers will work on the code and design of the app, test it thoroughly, and release it on app stores or to your internal team.
Keep reading for a better understanding of each of the five steps.
1. Project Planning
The app development process starts with analyzing your project requirements. A project manager will conduct a detailed study of your project and submit a project overview document for approval.
Once the project overview document is verified, you’ll receive a time and cost estimate. Project plans are then prepared based on the approved estimate. Typical project plans lay out all the tasks to build your app in different milestones, durations, and each task’s start and end dates.
At the same time, our business analysts carry out a detailed review. They determine what assets you need in the User Requirements Document (URD) and initial screen designs. With your final approval, the project transitions into the design phase.
2. Design
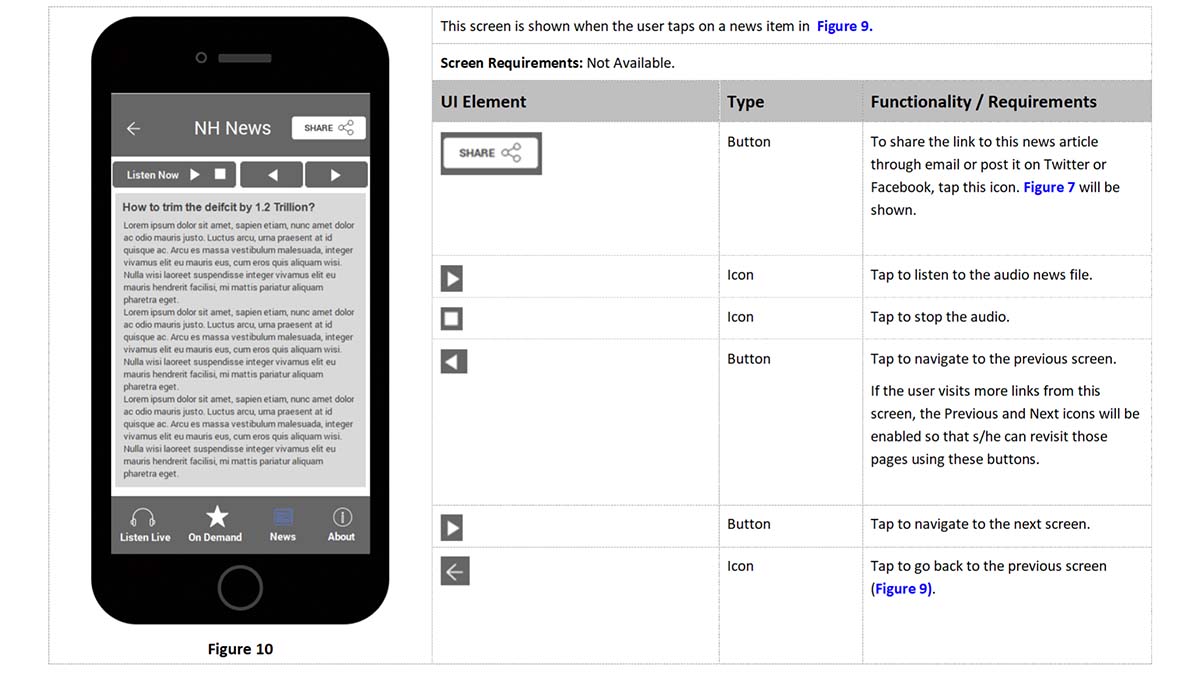
Sample from UI design document
Before starting the project design, we conduct team meetings to discuss the URD and any other notes or documents you provide. This meeting helps the team to get a clear idea of your expectations.
We then execute the project design in two phases: UI/UX design and architecture design.
UI/UX design determines how the app will look and how the user will interact with it. A UI design document will walk you through how the user will progress between screens and what each function will do. This may include button placement, the colors used, how a user navigates between screens, etc.
The architecture design is where we determine the best architecture for the whole system. For example, how data will flow from app to server and how we push app updates. We prepare a few documents here: high-level architecture, detailed data flow, and overall system design.
3. Development

The development phase is where we put the project’s plans into action. Developers take the requirements and write the necessary code for the required features. All the app’s screens will be ready at this stage, integrated with all functionalities.
At Zco, we follow agile development methodologies for creating apps. This method involves developing the functionalities through iterative, bi-weekly releases. We provide you with each release to gather your feedback. This efficient project workflow helps us achieve a more refined product by dividing resources to meet project deadlines on time.
Development continues with product testing, code reviews, and quality assurance so that errors or bugs in the program are caught early and rectified at each milestone. Client feedback and suggestions will be clarified and integrated into the app during each phase before moving on to the next milestone. This iterative process continues until the app is released.
Engineers working on the project also prepare unit test cases for the main features. This way, after the code changes, developers can do regression testing by running the respective unit tests.
4. Testing
Engineers prepare test plans and test cases early in the process, during the project design phase. We use a rigorous testing structure that includes usability, interface, compatibility, performance, and security testing. The application’s features, functionalities, and user experience flow are tested in each phase, helping us to maintain app quality.
Bugs are logged using an issue tracker database. Re-testing is done to check previously addressed issues. Developer testing is also conducted based on the test cases, and problems that arise from testing in various phases of reviews will be solved through debugging. This helps us to avoid product imperfections and ensure the performance of the application under different conditions. After testing the app, it is reviewed to ensure the app complies with the client’s requirements and expectations.
5. Launch
Once the app is tested and approved, it’s uploaded to its respective iOS and/or Android app store. Pre-release checklists are executed before the app’s launch to ensure quality assurance procedures. This includes source code reviews, memory leak testing, security testing, and performance analysis.
Test engineers prepare release notes by including information such as core features, installation instructions, bug reporting capabilities, and required credentials. This process helps inform clients about the app’s finalized features upon release.
When it comes to launching the app online, you’ll receive a pre-formatted app submission document. The upload engineer will provide your information to the respective app store’s listing application page and then submit it for review. Finally, the app will be released to the public once it receives final approval from the app store’s administrators.
Conclusion
Outside of getting your app developed, you’ll want to think about marketing and maintenance. Marketing includes having a website, running ads on sites like Google and Facebook, and having a social media presence. Maintenance includes updating the app as new operating systems are released and fixing bugs.
Regardless of what developer you work with, the most critical aspect is to have a firm understanding of your project. When paired with proper planning and attention to detail, you’ll be sure to end up with the perfect app for your target audience.

